Uploading Data
In the section on Using the Blind Proxy, we covered using the CLI command blind record create to ingest records. There are multiple ways to get data into Blind Insight. We'll go over the rest of them in detail here.
Introduction
Blind Insight supports a number of different ways to upload data. The most common is using the CLI command blind record create to ingest records. There are multiple ways to get data into Blind Insight. We'll go over the rest of them in detail here.
Supported File Types
The bulk upload features of the Blind Proxy support the following file types:
- JSON using the same documented format for creating records
- CSV that includes a header row that maps to field names on the Schema to which you're uploading
JSON Support
When using the CLI or API each JSON record must have a schema field that provides the URL (e.g. /api/schemas/{schema_id}/) to the schema for which the records will be conforming.
Tip
When using the web UI to upload, the schema ID value is provided automatically and may be omitted in the record objects.
CSV Support
Warning
CSV files must have a header row so that Blind Insight knows how to correlate each column name to field names on the Schema for the records. It is an error to not include a header row.
Please make sure that the data type for each column matches that of your schema. For example, if you have a schema with a field named age that is of type integer, then the data in the CSV for that column should be an integer and not a string. The CSV parser will raise a validation error if the data type does not match.
Tip
When using the web UI to upload, the schema ID value is provided automatically and may be omitted from the CSV header row.
When using the CLI or API, the schema cannot be automatically detected from the CSV file. Therefore, the CSV header row must have a "magic" header as the last entry in the headers formatted as schema_id:{schema_id}, for example:
During parsing this extra header is stripped out of the CSV data before processing the records.
Sample Datasets
We have a number of sample datasets that you can use to test the upload features of the Blind Proxy. You can find them in the Demo Datasets repository.
To utilize these sample datasets, start by cloning the repository.
Once you have cloned the repository, you can navigate to the datasets directory and choose one of the sample datasets to upload. The repository is organized as follows:
datasets/is the top-level directory containing all datasets.- Each subdirectory therein represents a dataset name.
- Each individual dataset contains
dataandschemasdirectories.
datasets
├── medical
│   ├── data
│   │   ├── condition_data.json
│   │   ├── medication_data.json
│   │   ├── patient_data.json
│   │   ├── procedure_data.json
│   │   └── wearable_data.json
│   └── schemas
│       ├── condition.json
│       ├── medication.json
│       ├── patient.json
│       ├── procedure.json
│       └── wearable.json
Each dataset has a corresponding schema that you can use to upload the data. You can find the schema for each dataset in the schemas directory.
Each schema has a corresponding JSON file that you can use to upload the data. You can find the JSON file for each dataset in the data directory.
Please see the README.md file in the demo-datasets repository for more information on the sample datasets.
Batch Uploads
The direct method using blind record create has a limit of 100 records as this utilizes the raw underlying API endpoint for encrypted record creation and does not have support for bulk or batch upload features.
Internally these are referred to as "Jobs".
To create a batch upload job, you can use:
- The Blind Proxy REST API endpoint
/api/jobs/upload/ - The Blind Proxy CLI command
blind jobs upload - The Web UI (Behind the Blind Proxy)
We will cover each of these in detail below.
API
Important
All API calls are authenticated using Basic authentication at this time. JWT tokens are supported but not yet documented. You must always provide a valid Authorization header with your API calls.
The Blind Proxy REST API endpoint /api/jobs/upload/ is used to create a batch upload job:
POST /api/jobs/upload/ HTTP/2
Content-Type: application/json

[
    {
        "data": {"name": "Bob", "age": 42},
        "schema": "/api/schemas/T9ebhvLhBGvHwGQQ6C4oZZ/"
    },
    {
        "data": {"name": "Alice", "age": 29},
        "schema": "/api/schemas/T9ebhvLhBGvHwGQQ6C4oZZ/"
    }
]
CSV content is supported by providing a Content-Type header of text/csv and the body being the CSV content:
POST /api/jobs/upload/ HTTP/2
Content-Type: text/csv

name,age,schema_id:T9ebhvLhBGvHwGQQ6C4oZZ
Bob,42
Alice,29
Warning
Do not forget the "magic" header in the CSV file when using the API directly. Please see the CSV Support section above for more information.
Upon successful creation of a job, a random UUID assigned as the job ID and a 201 Created response will be returned with the following response body:
HTTP/2 201 Created
X-Job-ID: 7b8e9f2d-4a3c-4e5f-8d1a-6b9c0d3e2f1a
X-Job-Status-URL: /api/jobs/7b8e9f2d-4a3c-4e5f-8d1a-6b9c0d3e2f1a/
X-Job-Websocket-URL: /api/ws/jobs/7b8e9f2d-4a3c-4e5f-8d1a-6b9c0d3e2f1a/

{
    "job_id": "7b8e9f2d-4a3c-4e5f-8d1a-6b9c0d3e2f1a"
}
X-Job-IDwill be the ID of the job that was created.X-Job-Status-URLwill be the URL to the job status endpoint.X-Job-Websocket-URLwill be the URL to the job websocket endpoint.
The job status endpoint can be polled to check the status of the job:
The job websocket endpoint can be used to receive real-time updates on the status of the job:
The job status and websocket endpoints will return messages to the client with the following payloads:
{
  "status": "processing",
  "processed": 42,
  "total": 100,
  "current_batch": 5,
  "total_batches": 10,
  "error": ""
}
Note
When there is no error, the error field will not be present in the response body.
Valid status values are:
uploading- The job is currently uploading.processing- The job is currently processing.completed- The job has completed successfully.failed- The job has failed.
CLI
Important
The CLI requires that you use blind login to authenticate before using the blind jobs upload command. Please see the Using the Blind Proxy section on Logging into the API for more information.
The CLI command blind jobs upload is used to create a batch upload job:
CSV files are also supported using the --data flag:
The batch size can be controlled by the --X-Batch-Size flag, which defaults to 10 and is the maximum number of records that will be uploaded in a single batch.
Warning
The CLI will display the job ID but it will not display upload progress. You will have to poll the job status or use the websocket endpoint to check the status of the job.
Web UI
Important
This assumes that you're already logged into the web UI and have a valid session cookie.
Warning
There is a file limit of approximately 2GB for uploads via the web UI. This limitation varies by browser and device. For uploads of larger files, please use the CLI, API, or see the Very Large Uploads section below.
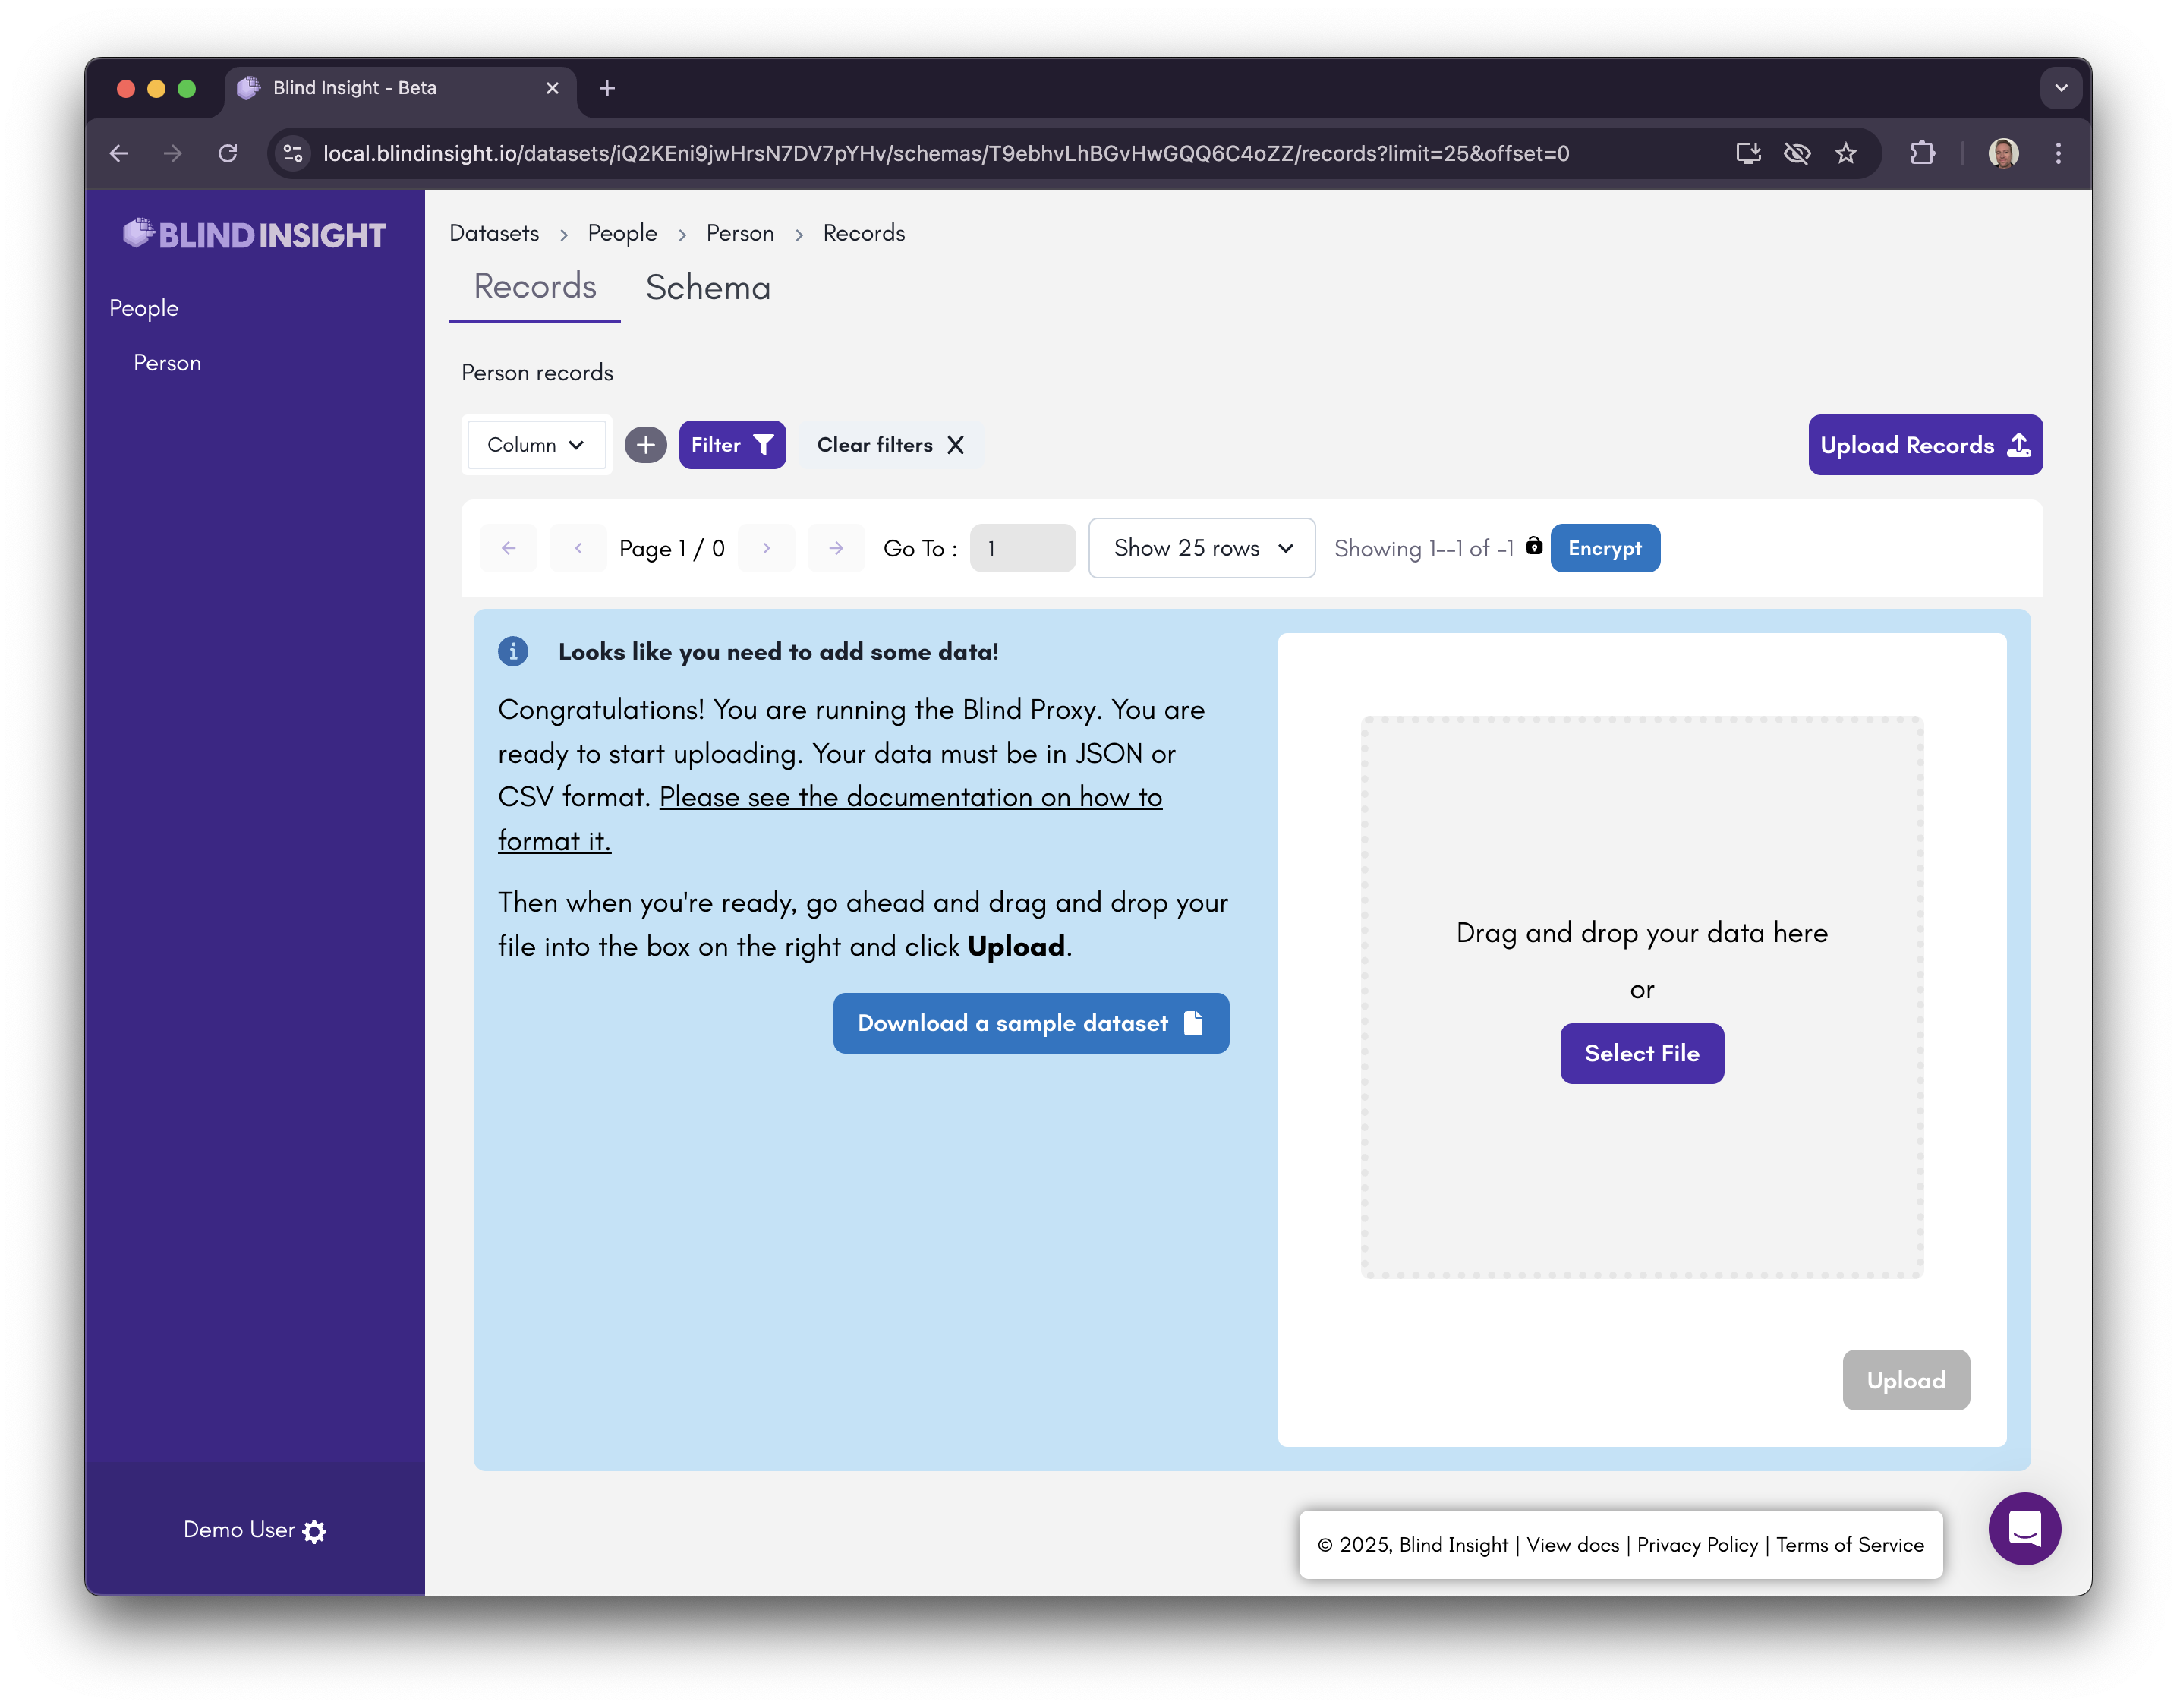
The web UI will automatically create a batch upload job when a CSV or JSON file is uploaded. To get started, nagivate to the list of records for a given schema.
When you have a newly-created schema, you will see the following empty state with a disabled Upload button that allows you to upload a CSV or JSON file by dragging and dropping a file onto the upload area:
Let's upload a the same JSON file containing six (6) records from the Using the Blind Proxy section to our new schema by dragging and dropping a file onto the upload area observing that the filename is automatically detected and the Upload button activates:
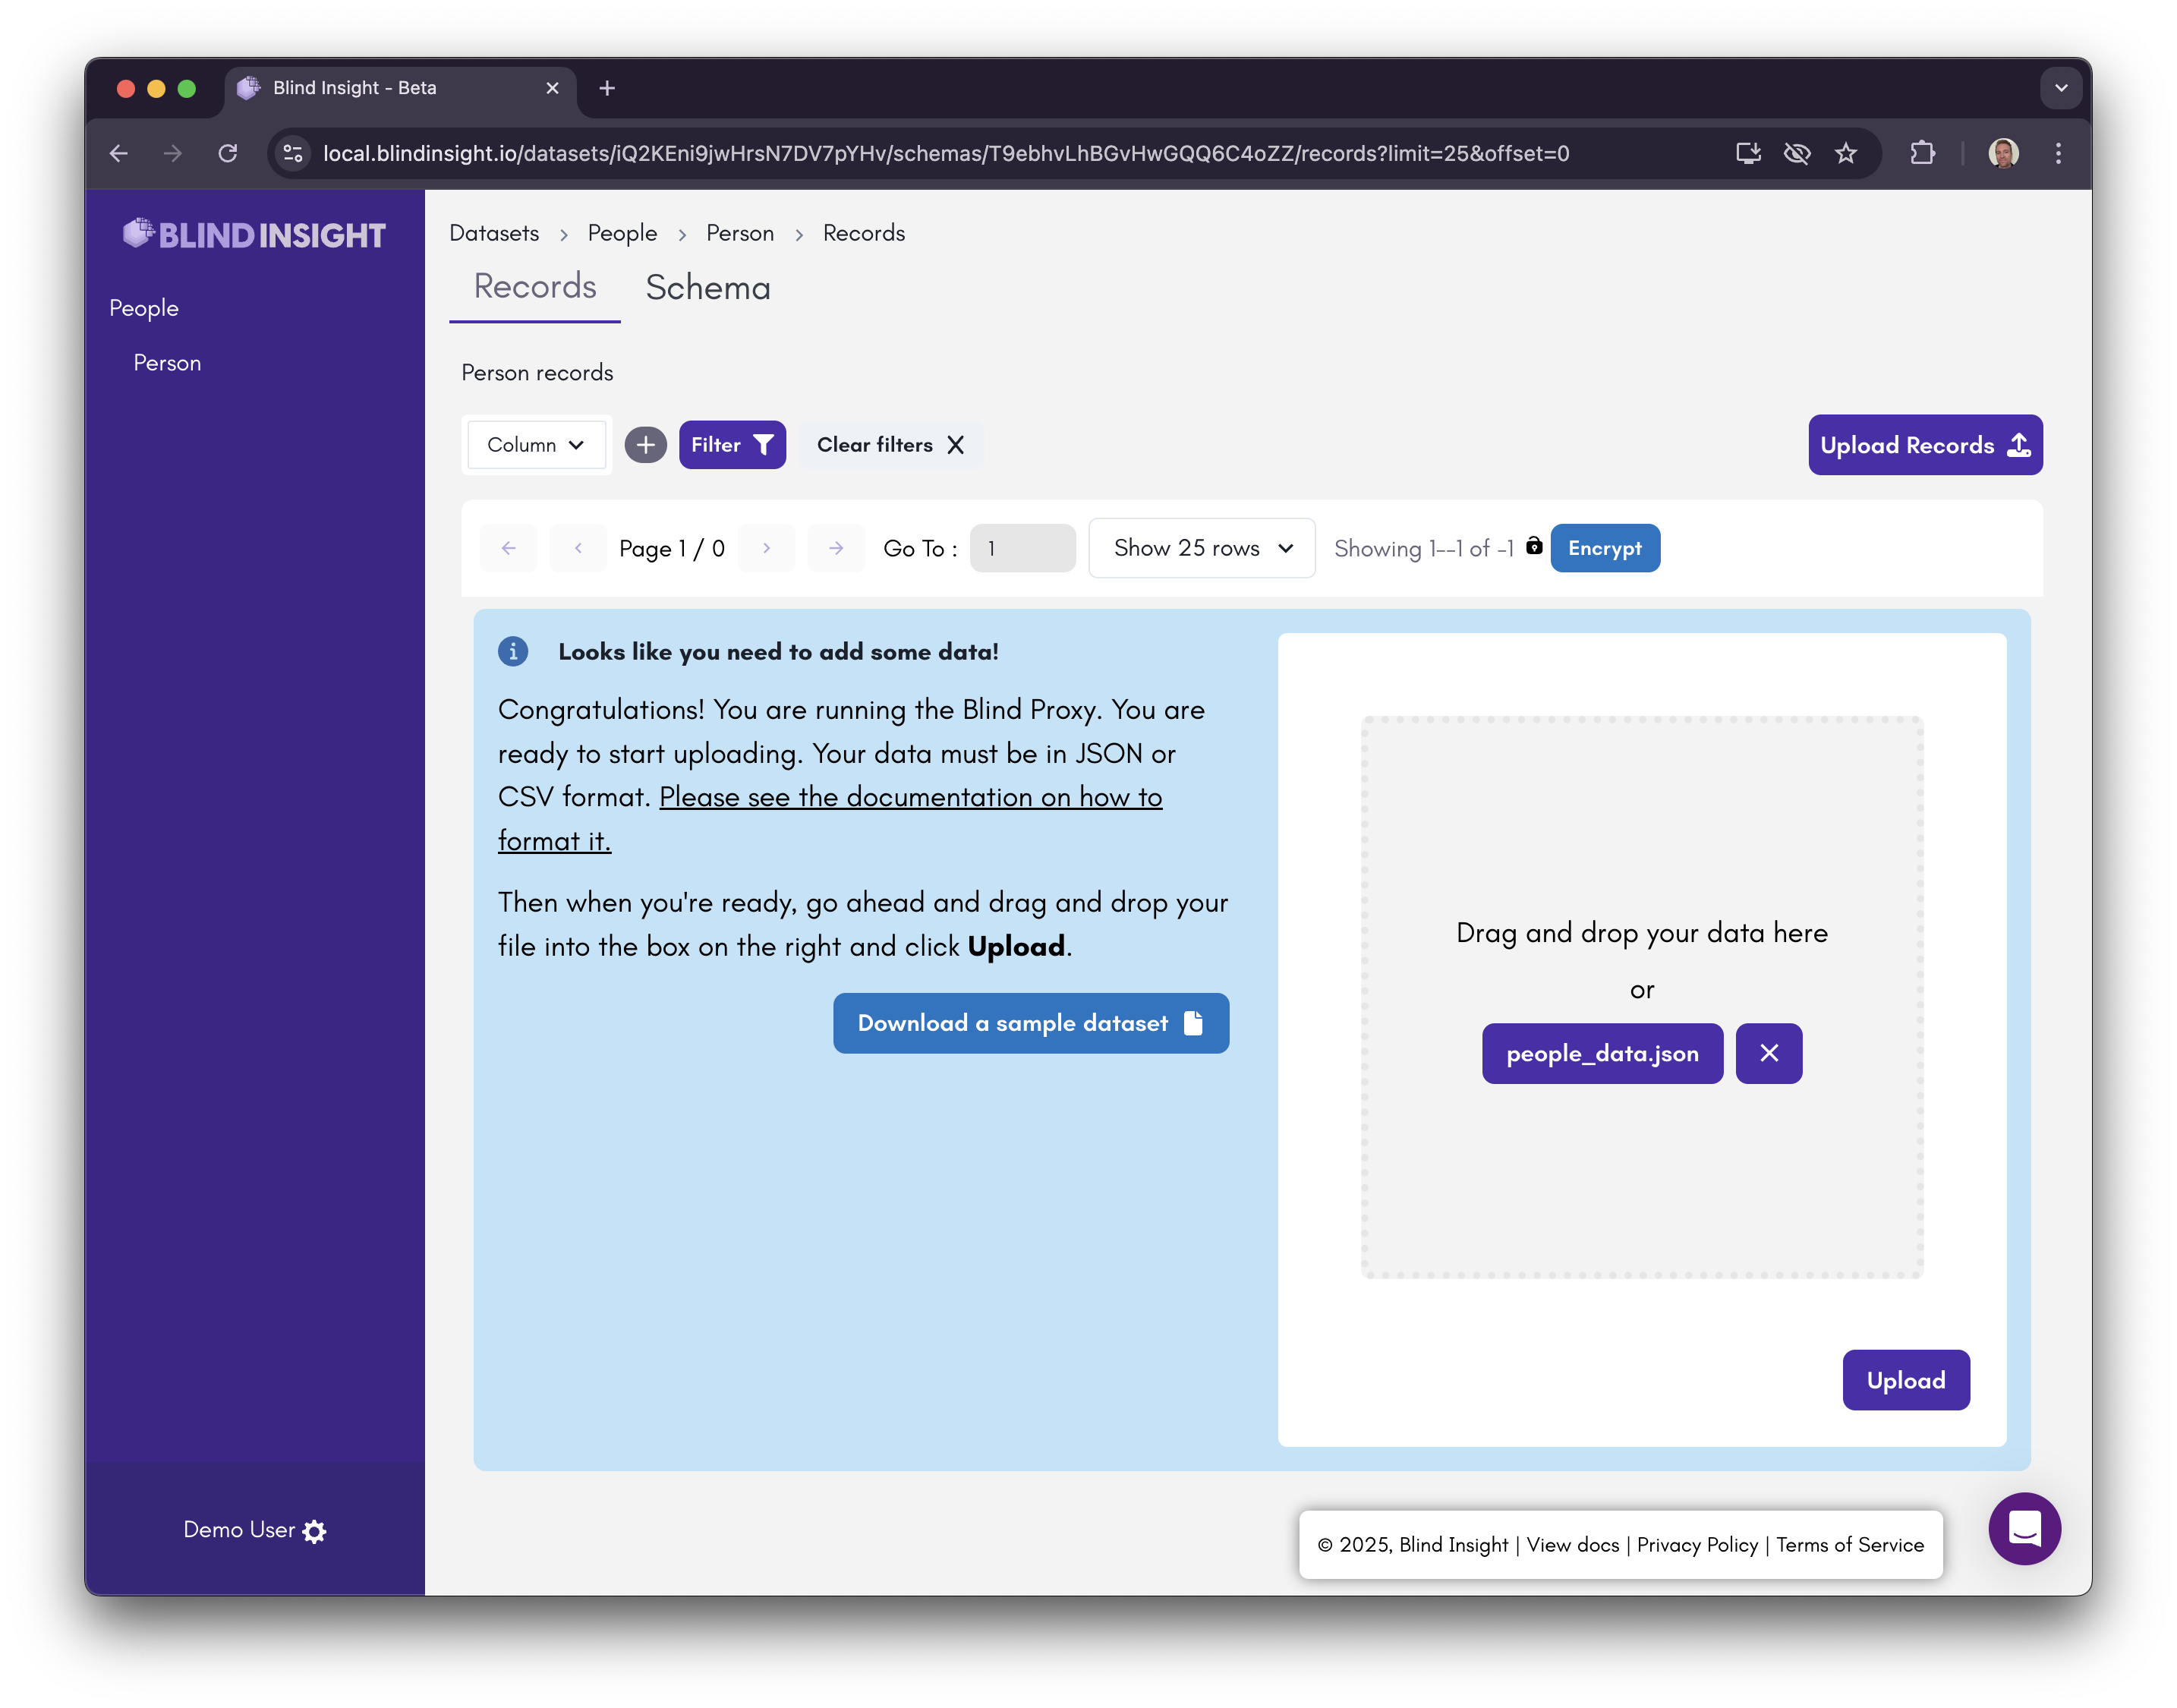
Depending on how many records you uploaded, you may have seen a progress bar. Now you've got some records. Now that you've got some records, you can click the Upload Records button to start another upload:

Let's upload a another batch with a few more records (1,000 to be exact) to our new schema by dragging and dropping a file onto the upload area and clicking the Upload button, and check out that progress bar:
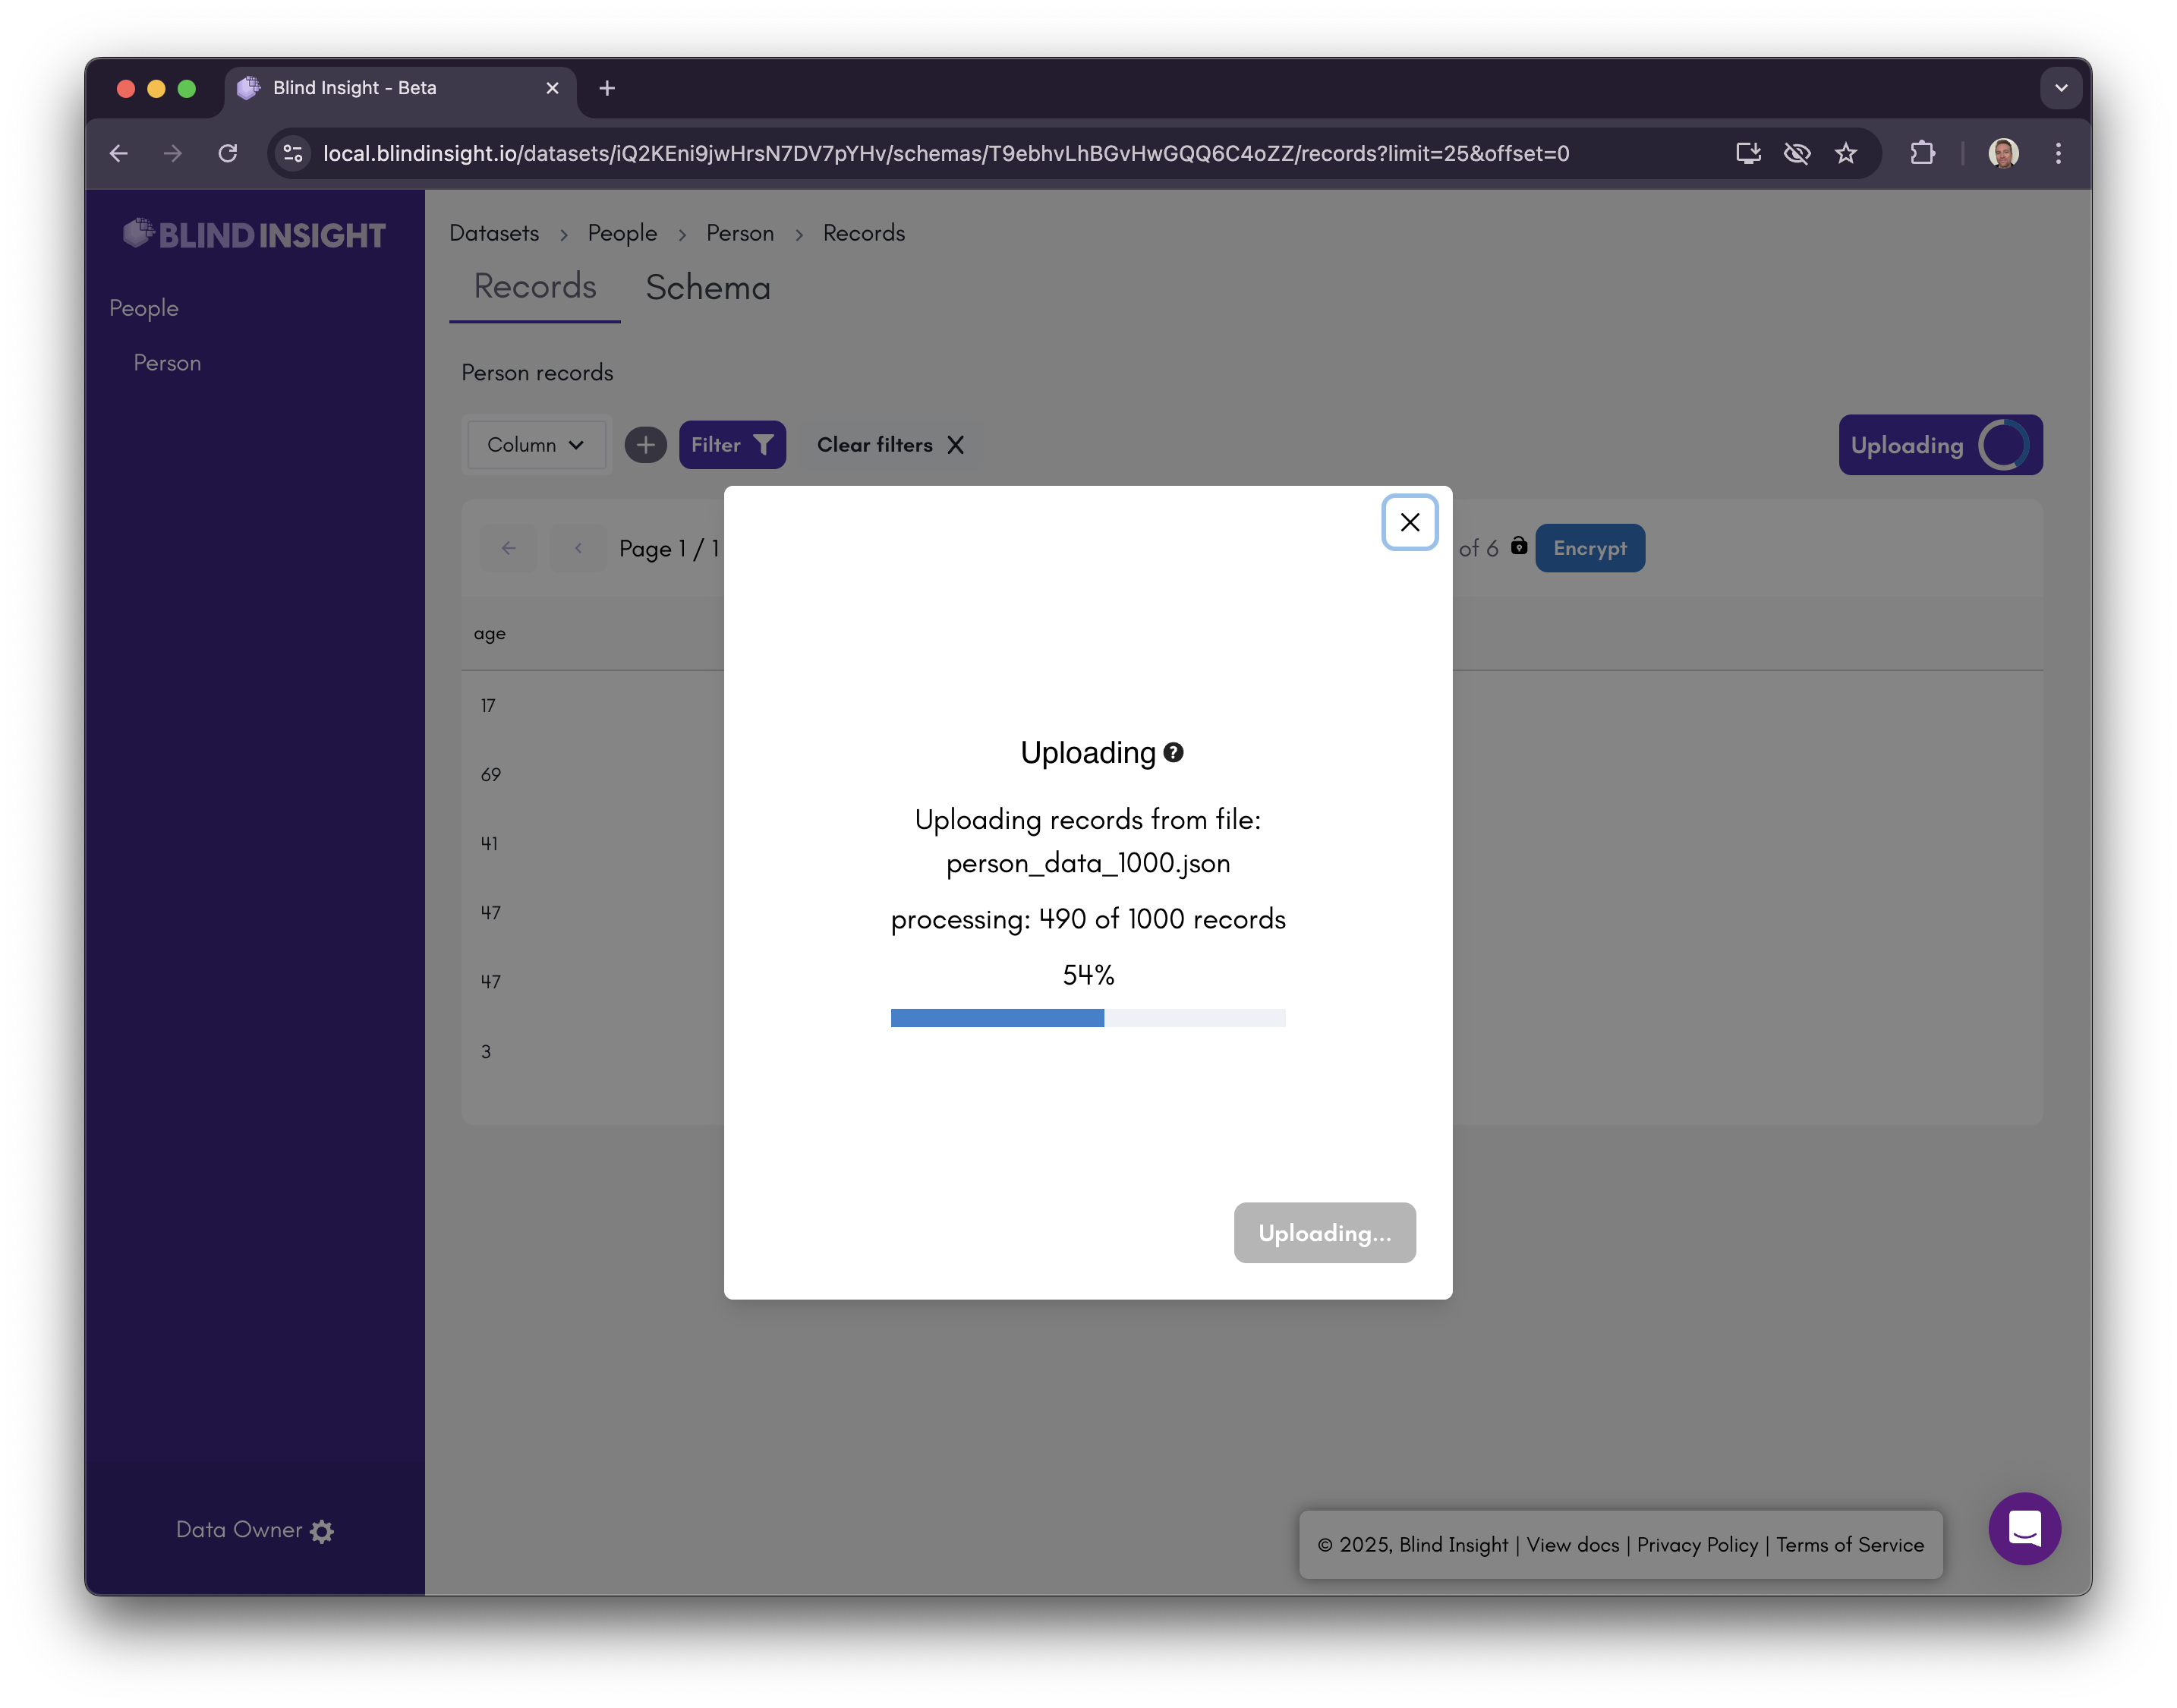
When the upload is complete, you will see the records in the list of records for the schema.
Uploading CSV files are just as easy as JSON files. Try it out for yourself!
From here you will be able search uploaded records as illustrated in the Using the Blind Proxy section on Encrypted Search. Are we having fun yet? And you thought you were just going to upload some records!
Success
You did it!
Very Large Uploads
For very large uploads of >2GB we support using the TUS protocol, a resumable file upload protocol.
We'll cover this in more detail later. But for now, know that you can point a TUS-compatible client to /api/files/ on a running Blind Proxy instance and it will be fully compatible with uploading files using TUS.
The same file formats supported by batch uploads (CSV, JSON) are supported here.
A sample request flow would go something like this:
Creating an Upload
Initial Request
POST /api/files/ HTTP/2
Tus-Resumable: 1.0.0
Upload-Length: {bytes}
Upload-Metadata: filename {base64_filename}, filetype {base64_filetype}
Initial Response
HTTP/2 201 Created
Location: {server_url}/api/files/{file_id}
X-Job-Id: {job_id}
X-Job-Status-Url: {server_url}/api/jobs/{job_id}/
X-Job-Websocket-Url: {server_url}/api/ws/jobs/{job_id}/
Sending File Data
Extracting the Location header from the Initial Response, you would then send a PATCH request to that URL.
Request
PATCH /api/files/:file_id/ HTTP/2
Tus-Resumable: 1.0.0
Content-Type: application/offset+octet-stream
Upload-Offset: {current_offset} (0 for new file, or wherever chunk picks up)
{file binary contents}
Response
HTTP/2 204 No Content
Tus-Resumable: 1.0.0
Upload-Offset: {new_offset} # Server response with bytes received in first PATCH
In keeping with TUS, you would then send a new PATCH request for each chunk of the file, sending the new Upload-Offset header from each prior response, with each subsequent request.